Month 2 - Week 2
Wedding rings
Continuing on from last week, I converted the polysurface of my mobius twist to SubD. The main difference is in the filleting (rounding) of the crease (edge) that makes the surface continuous and much more pleasing:
In Rhino 8 there is a new feature that gives you localized control the crease amount at each point. For example, I could start it at 20% at the bottom (very soft) to 80% near the top (sharp):
I played around with different values to see what I liked the look of:
I ended up going with a consistent 70% crease. Unfortunately the differences in the creases is too small a detail to be noticeable in a print from my 3D printer, so I can only judge based on the image and hope the final one looks similar!
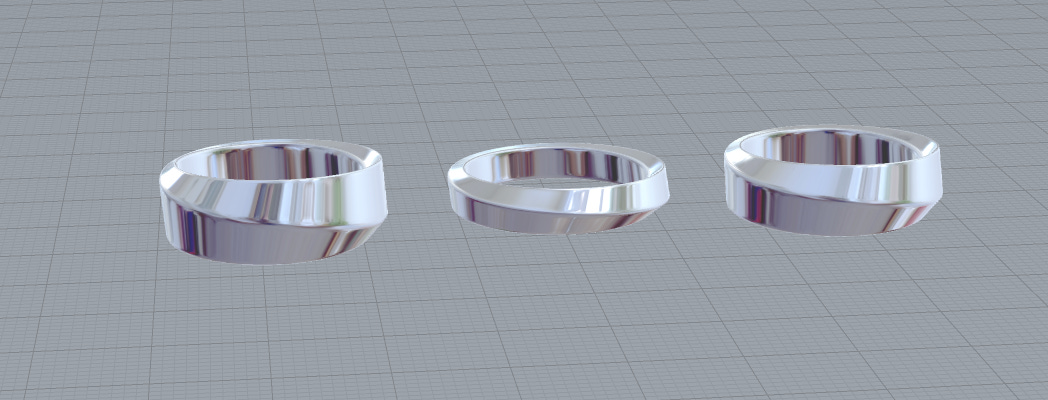
Next variable to play with was the height of the ring. I had originally designed it very thick, but I had the feeling a thinner ring would look more elegant.
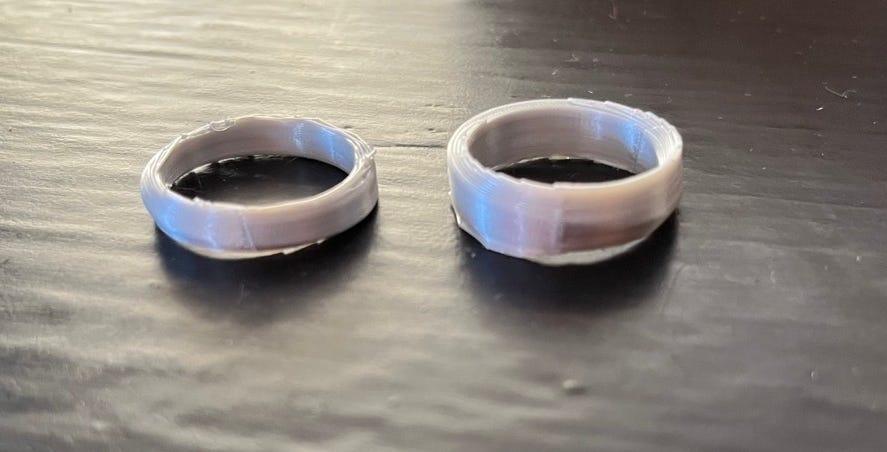
This one we could test with a physical prototype:
However, P was keen on a thicker ring to ‘challenge the norm’ a little bit, so we settled on the middle thickness.
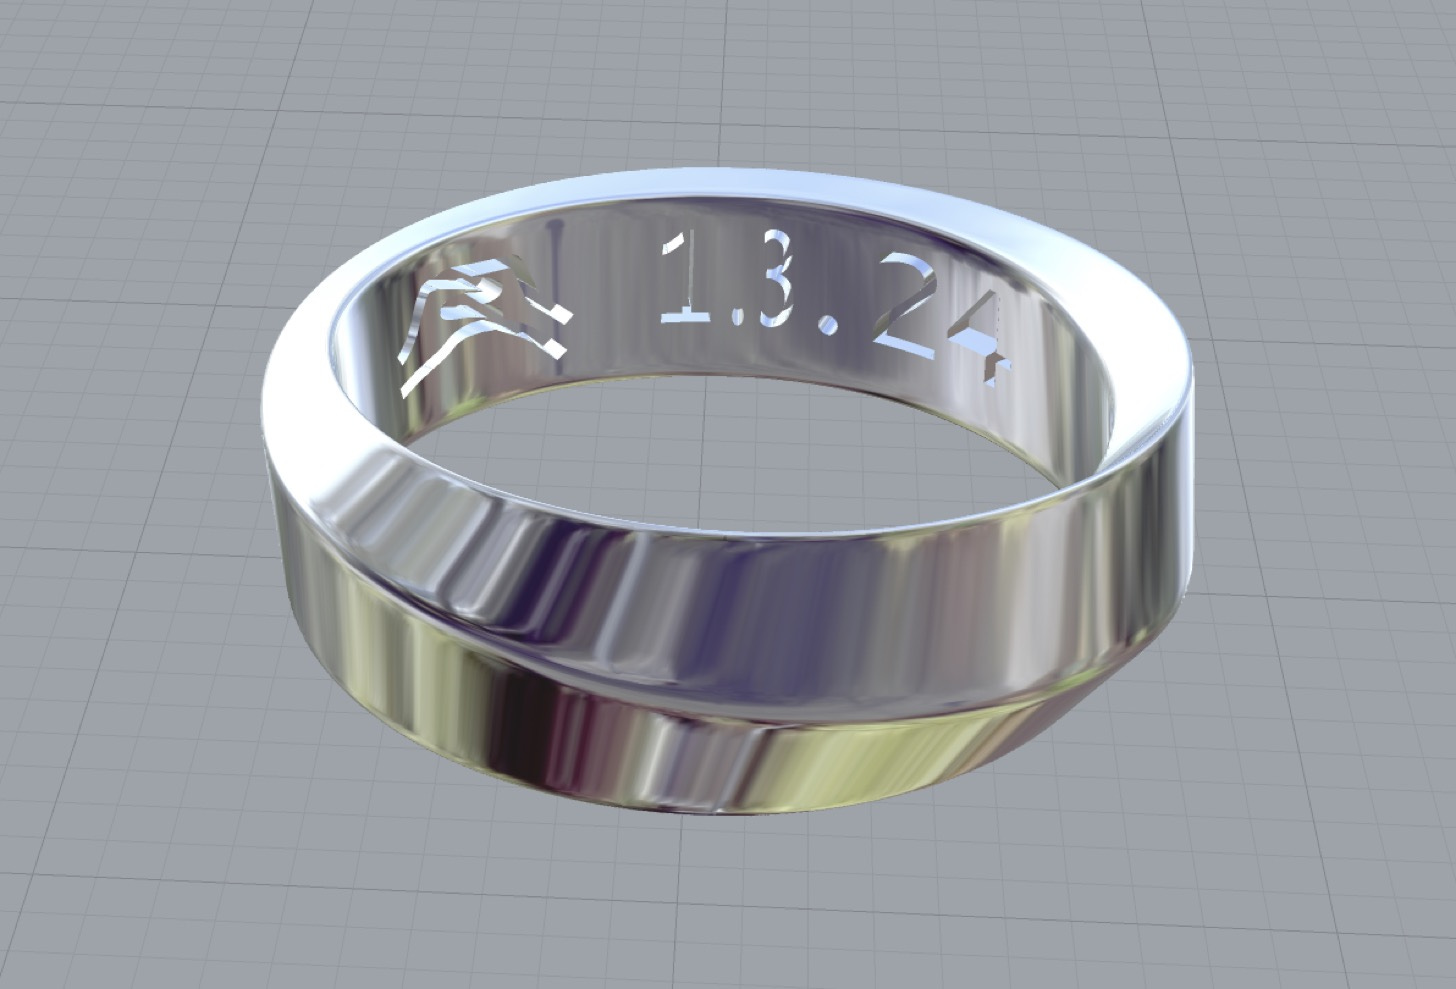
Finally, I decided I wanted to try engraving something on the inside of the band. It took me a few hours of fiddling around and trial and error to both hone the design and figure out how to do it technically in Rhino. As is often the case, now that I know how to do it, it’s super easy, but there was definitely some frustration along the way.
Originally, one of the ring designs we had discussed would be complementary shapes that would fit into each other, something like a yin-yang symbol. I was recently inspired in this direction again when I chatted to my physio, he showed me the wedding ring he had designed for his wife:
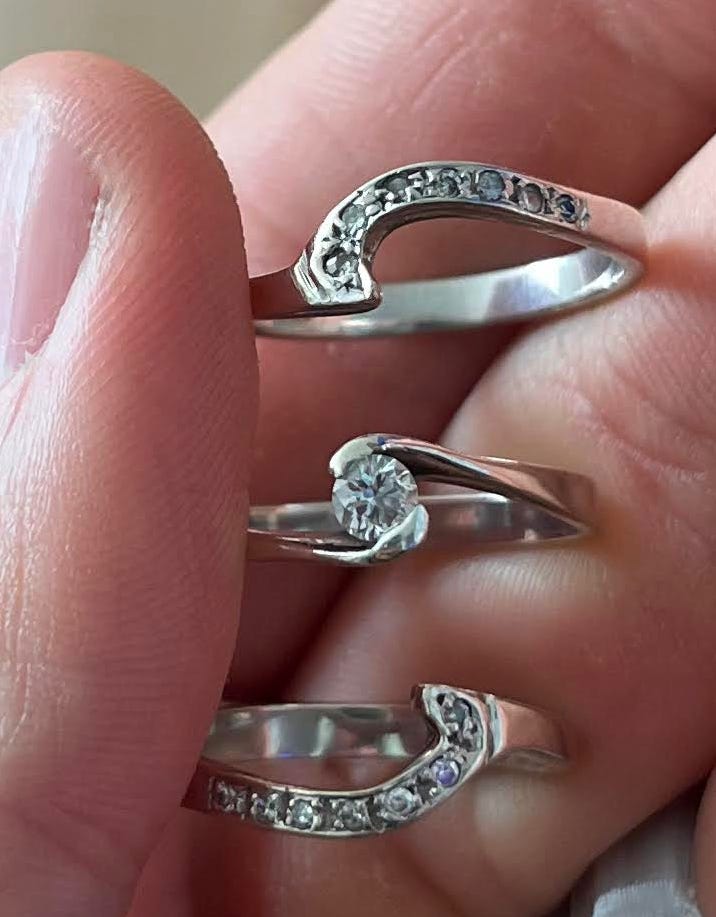
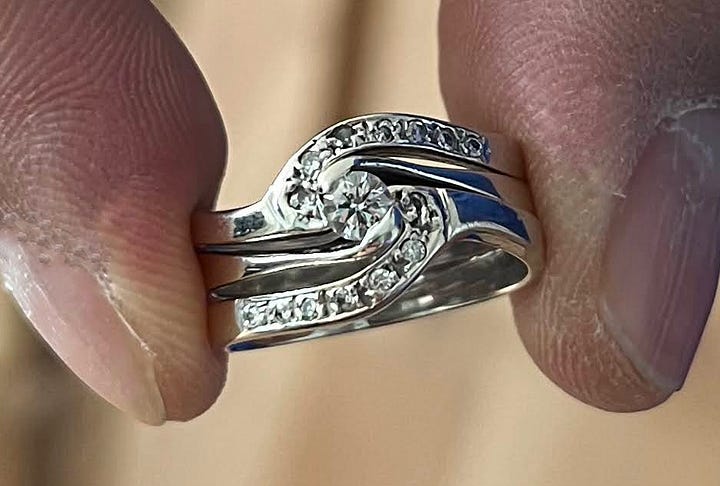
I like the way they fit together into a single coherent design, but also look beautiful separately. I think the next ring I design might borrow some elements of this.
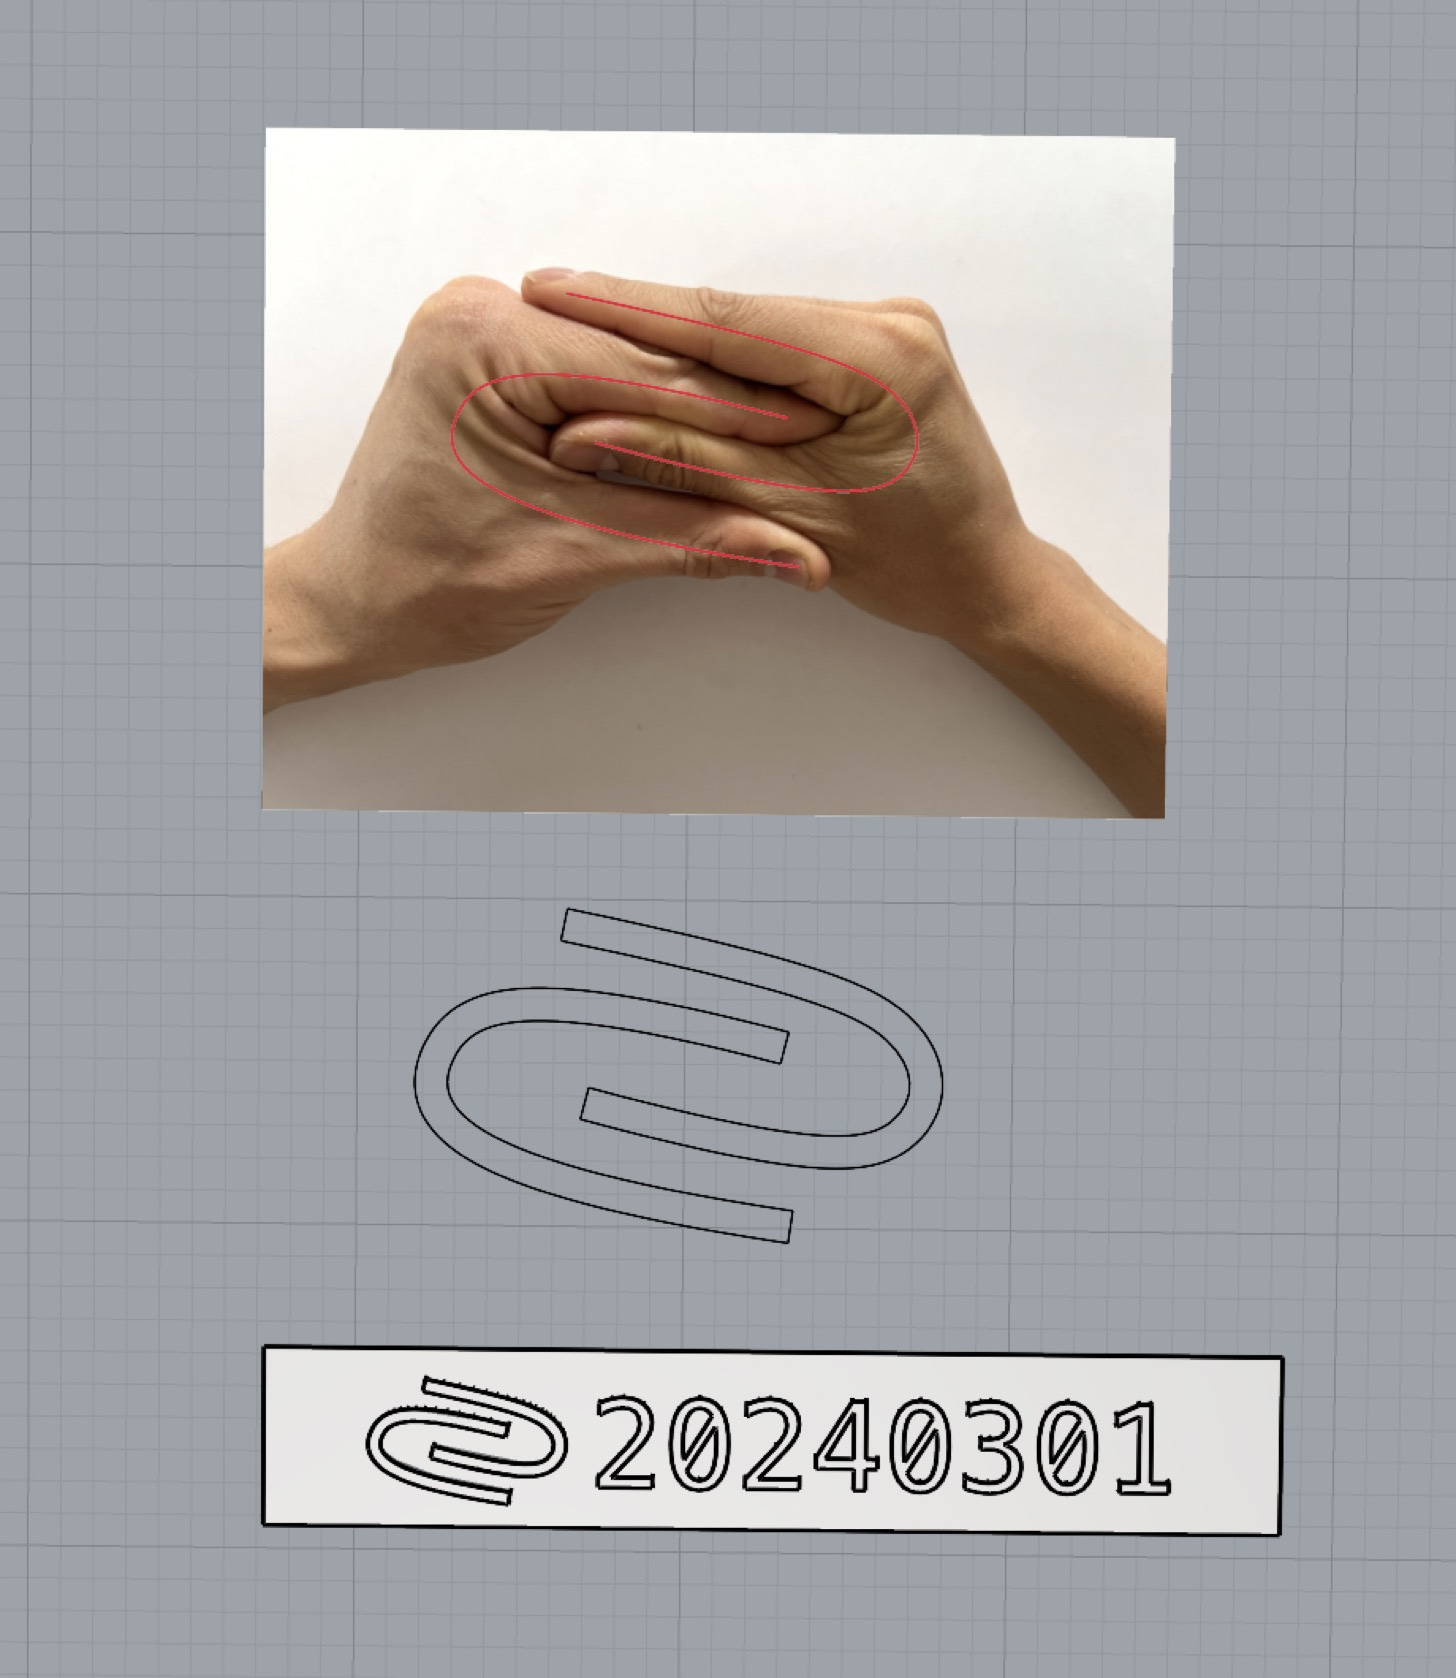
For now, I wanted to include something personal on the inside of our rings. My idea was to incorporate a gesture of affection that P and I often do with out hands:
So I traced it in Rhino and started experimenting with different shapes (and the date of our wedding) that would end up as an engraving:
Transferring this 2D sketch into a 3D curved engraving pushed me out of my comfort zone in Rhino. So I can look back and remember the process for next time, I’m going to detail it here:
The right tool in Rhino is ‘Flow Along Surface’, which takes an input object, a base plane, and a target plane
To create negative space in the ring wall, I need to flow an extruded solid and then subtract it
Turns out you can’t subtract from a SubD surface, so I had to convert the ring to NURBS, then extract a plane that I want to flow along (using ‘Extract Surface’)
I needed to rebuild the extracted surface to simplify the geometry and make sure each panel was similar so the engraving would flow without distortion
Then I had to make sure my engraving text and logos were closed curves, extrude them, and sink them slightly below the base plane (which should be the same length and width as the extracted inner surface)
After flowing it along the inner surface, I used a Boolean Difference function to cut it out. Finally, it worked!
It was a fun process. I iterated on the design in an attempt to make it a bit more timeless and elegant (I’m sure someday I’ll look back on this and laugh at how amateur I was):
Here are the final two rings:
This week I’ve sent them off to be printed in wax in high resolution, and hopefully I will get them cast in metal as well. Crunch time!
I’m unsure on a few things, so I’m nervously anticipating the wax version to see if:
the engraving will be deep enough
the resolution will be enough to capture the text
the edges will be soft enough
the size will feel good for us both (especially as fingers swell over 24 hours)
I recently learned about ‘comfort fit’ for rings, essentially the inner surface is slightly domed, which reduces the contact area of metal and skin, making it more comfortable and easier to slip on and off. I ran out of time to add that into the design. Next ring I’ll do that!
neoBRUTO
The only update here is an aftermovie created by David’s friends Melany and Kiyoshi:


