


Month 1 - The Phoenix
An incredible pre-honeymoon, the end of another startup chapter, prototyping wedding rings, and launching a new interactive gen AI project

Happy new year! I’m back with the first proper post of my 2024 challenge.
I took a month off from writing my weekly posts after 52 Weeks ended, and honestly I really missed that weekly ritual. Publishing my thoughts and progress each week is a great anchor and motivator for my creativity. Although I wasn’t writing, I didn’t stop making stuff though, so this post is pretty long!
Month 0 Recap: Relaxing
My partner and I decided to go on a pre-honeymoon to Japan, and we achieved my first goal of the year, which was to relax, disconnect, and enjoy some quality time together. We ate, we hiked snowy mountains, we soaked in onsens, we learned to cook Japanese food, I took a judo class, saw some hilarious theatre, and far too many other weird and wonderful things to summarize in a paragraph. Ask me in person if you want to hear more!
Project 0 - Startups are volatile
I was very excited to return refreshed from a holiday to sink my teeth into a new full-time role at a startup, where I had been working 2 days a week for the previous 3 months. We were using 3D workflows to scan, model, and print prosthetics for lower limb amputees, and we were on the cutting edge of applications of this developing technology. Unfortunately, as is all too common with startups, and particularly hardware startups, the time and cost of R&D is significant, and in our case the founder decided we weren’t ready to take more funding without more time exploring the needs of clinicians. So the rest of the team and I suddenly found ourselves with some free time again to figure out what’s next.
I’m getting married soon, and the silver lining is I now have more time to devote to planning the wedding (we aren’t using a wedding planner, so we’re playing on hard mode!).
One wedding related project I now could put time into is:
Project 1 - Wedding rings
From the moment I was introduced to 3D modeling and printing I knew I wanted to make jewelry. What a beautiful opportunity to design our own wedding rings. I reasoned that the bar should probably be higher for this project than my 52 Weeks standard, so I sought out an experienced jeweler to help me.
JP at Ekam Atelier is based in Mexico City and has incredible craftsmanship. His process of making rings is called ‘lost wax casting’, and has been around for thousands of years.
At a high level, this involves:
sculpting the piece out of wax (there are various hardnesses of wax, and some of them come pre-shaped into a ring form)
placing it on a kind of tree holder that fits into a hollow cylinder
filling that cylinder with investment powder and sealing it except for a hole at the top and bottom
heating it to 600° or 800°C until the wax melts out, leaving the powder and negative space inside the cylinder
inverting it, placing it on vacuum device, then pouring liquid metal through it until the negative space is completely filled (plus some extra for margin of safety)
letting that cool for a few hours, then burning off the powder
cutting the metal pieces off and fitting them together (if there are multiple pieces)
sanding, polishing, finishing

Here’s a video of the whole process.
My digital version of this will be very similar, the only difference is that instead of sculpting the wax by hand, I’ll model it with software then 3D print the wax. After that, the process is the same.
I recently came across another beautiful jeweler called Werkstatt Munchen, in particular their ‘twisted ring’ caught my eye for its simplicity and subtlety:


I thought this would be a great model to work towards to start on my ring designing journey, particularly as in theory it looks easy to model with software.
My dream was to use parametric design to create this ring, which means programmatically generating the shapes and geometry using algorithms using Grasshopper, an extension of Rhino. The twist in the ring appears to be a kind of Möbius strip, so I found a few tutorials to make twisted geometry parametrically:
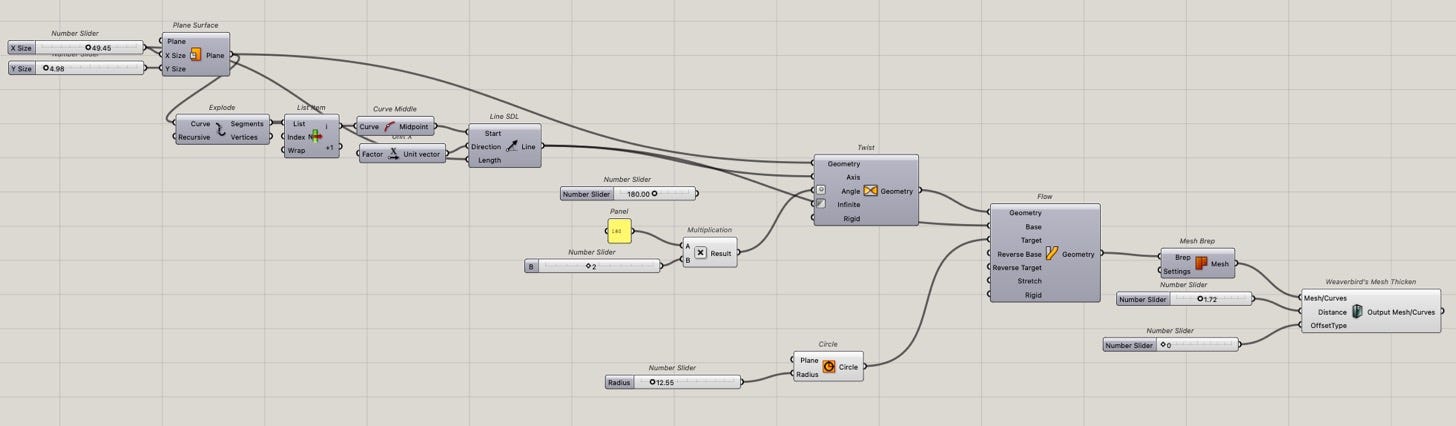
Here’s how this looks as a 3D model:
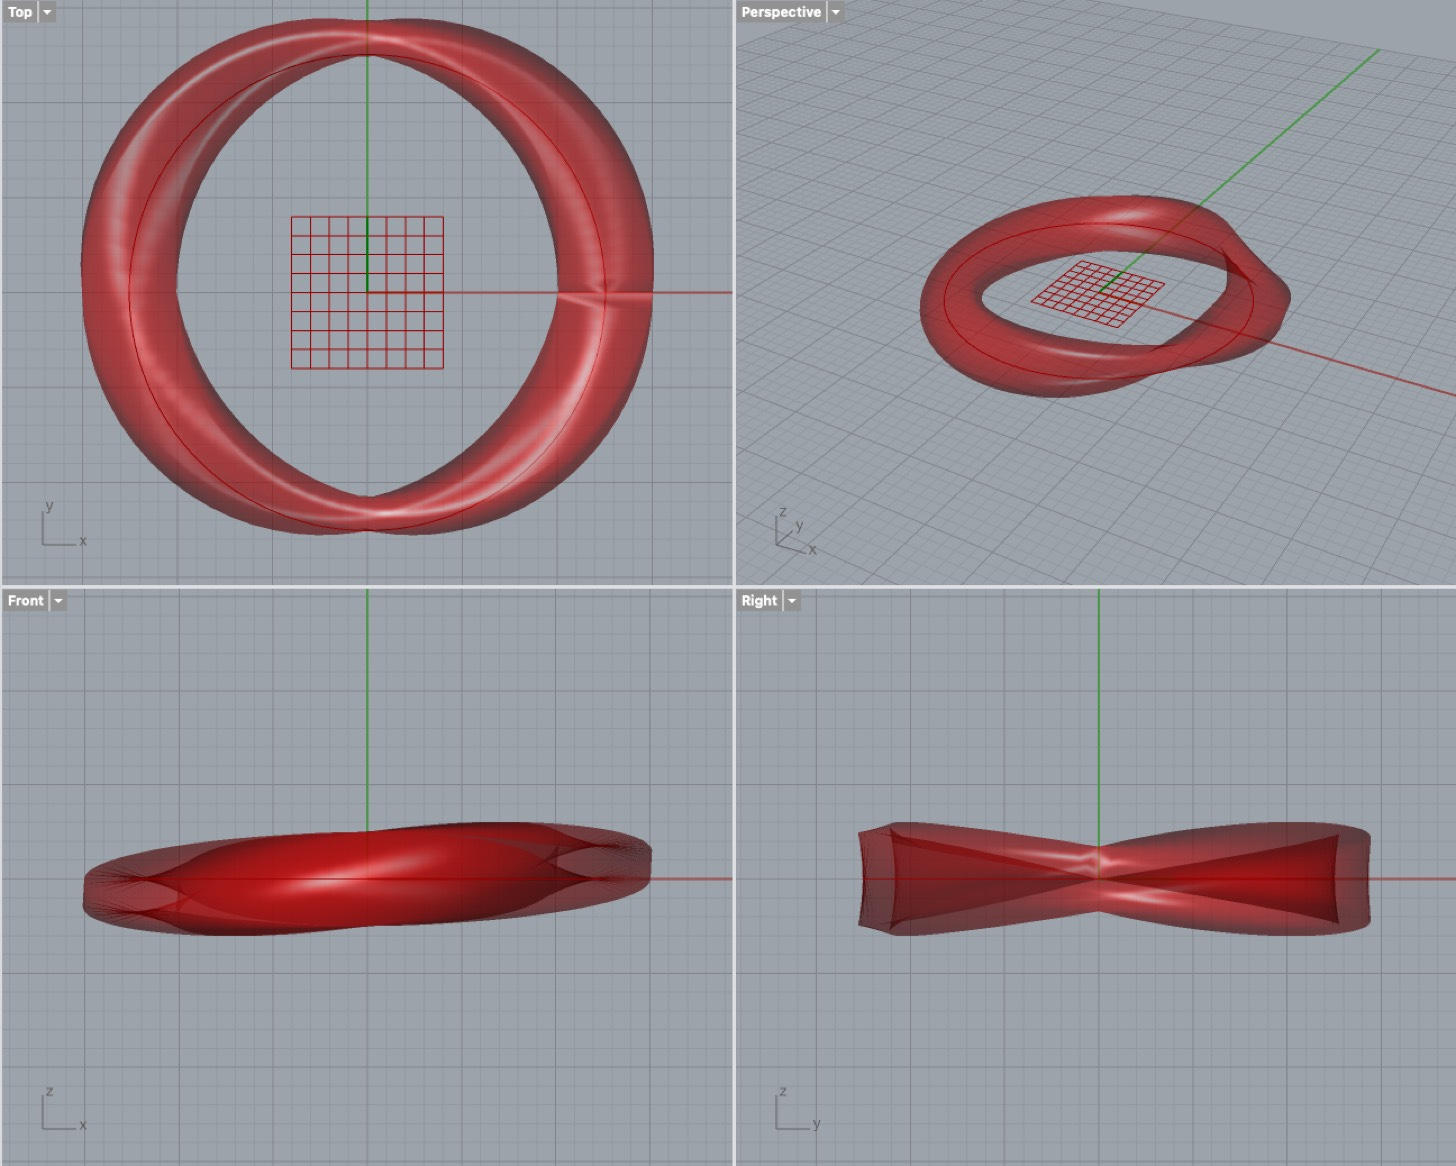
And printed in gold PLA:


For my first attempt I was pretty pleased with the shape! However, the dimensions aren’t really functional as a ring - it doesn’t hug the finger snugly, and is far too bulky and angular.
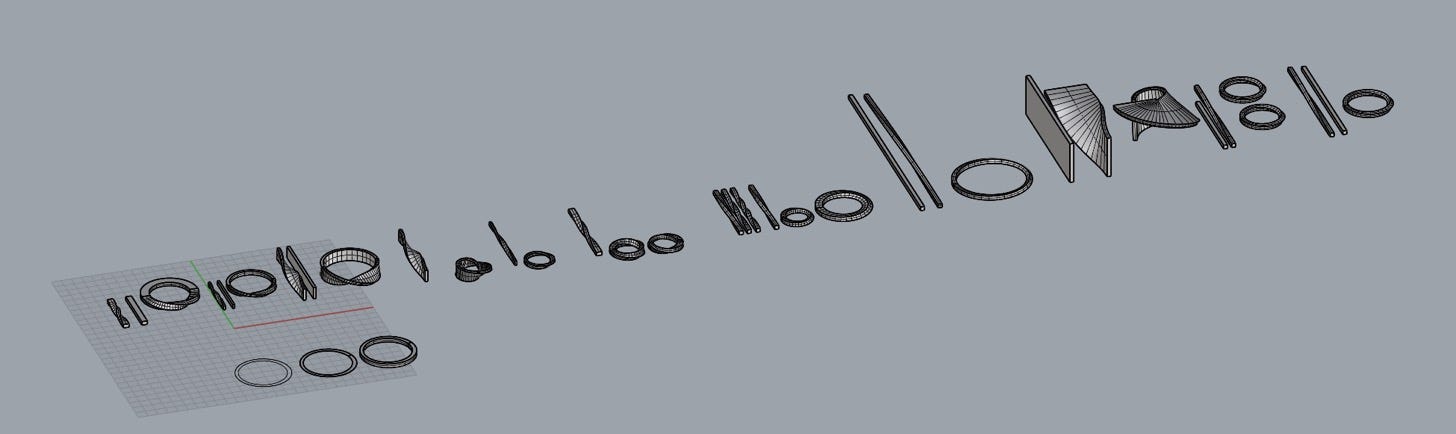
Referring back to the twisted ring above, I need to make the shape much more square, and the twist much less pronounced. I didn’t completely understand the geometry, and this is where I hit the limits of my parametric modeling abilities. I will definitely return to this approach, but I was eager to prototype more quickly, so I decided to swap to explicit modeling in Rhino directly. This means I can digitally manipulate the shapes as if I were using tools on a wax object:
This part was really fun, and it felt somewhat like having an actual workshop to experiment with different forms and shapes. Here’s some of the exploration:
Between each ring I printed it out and tested it on our fingers:
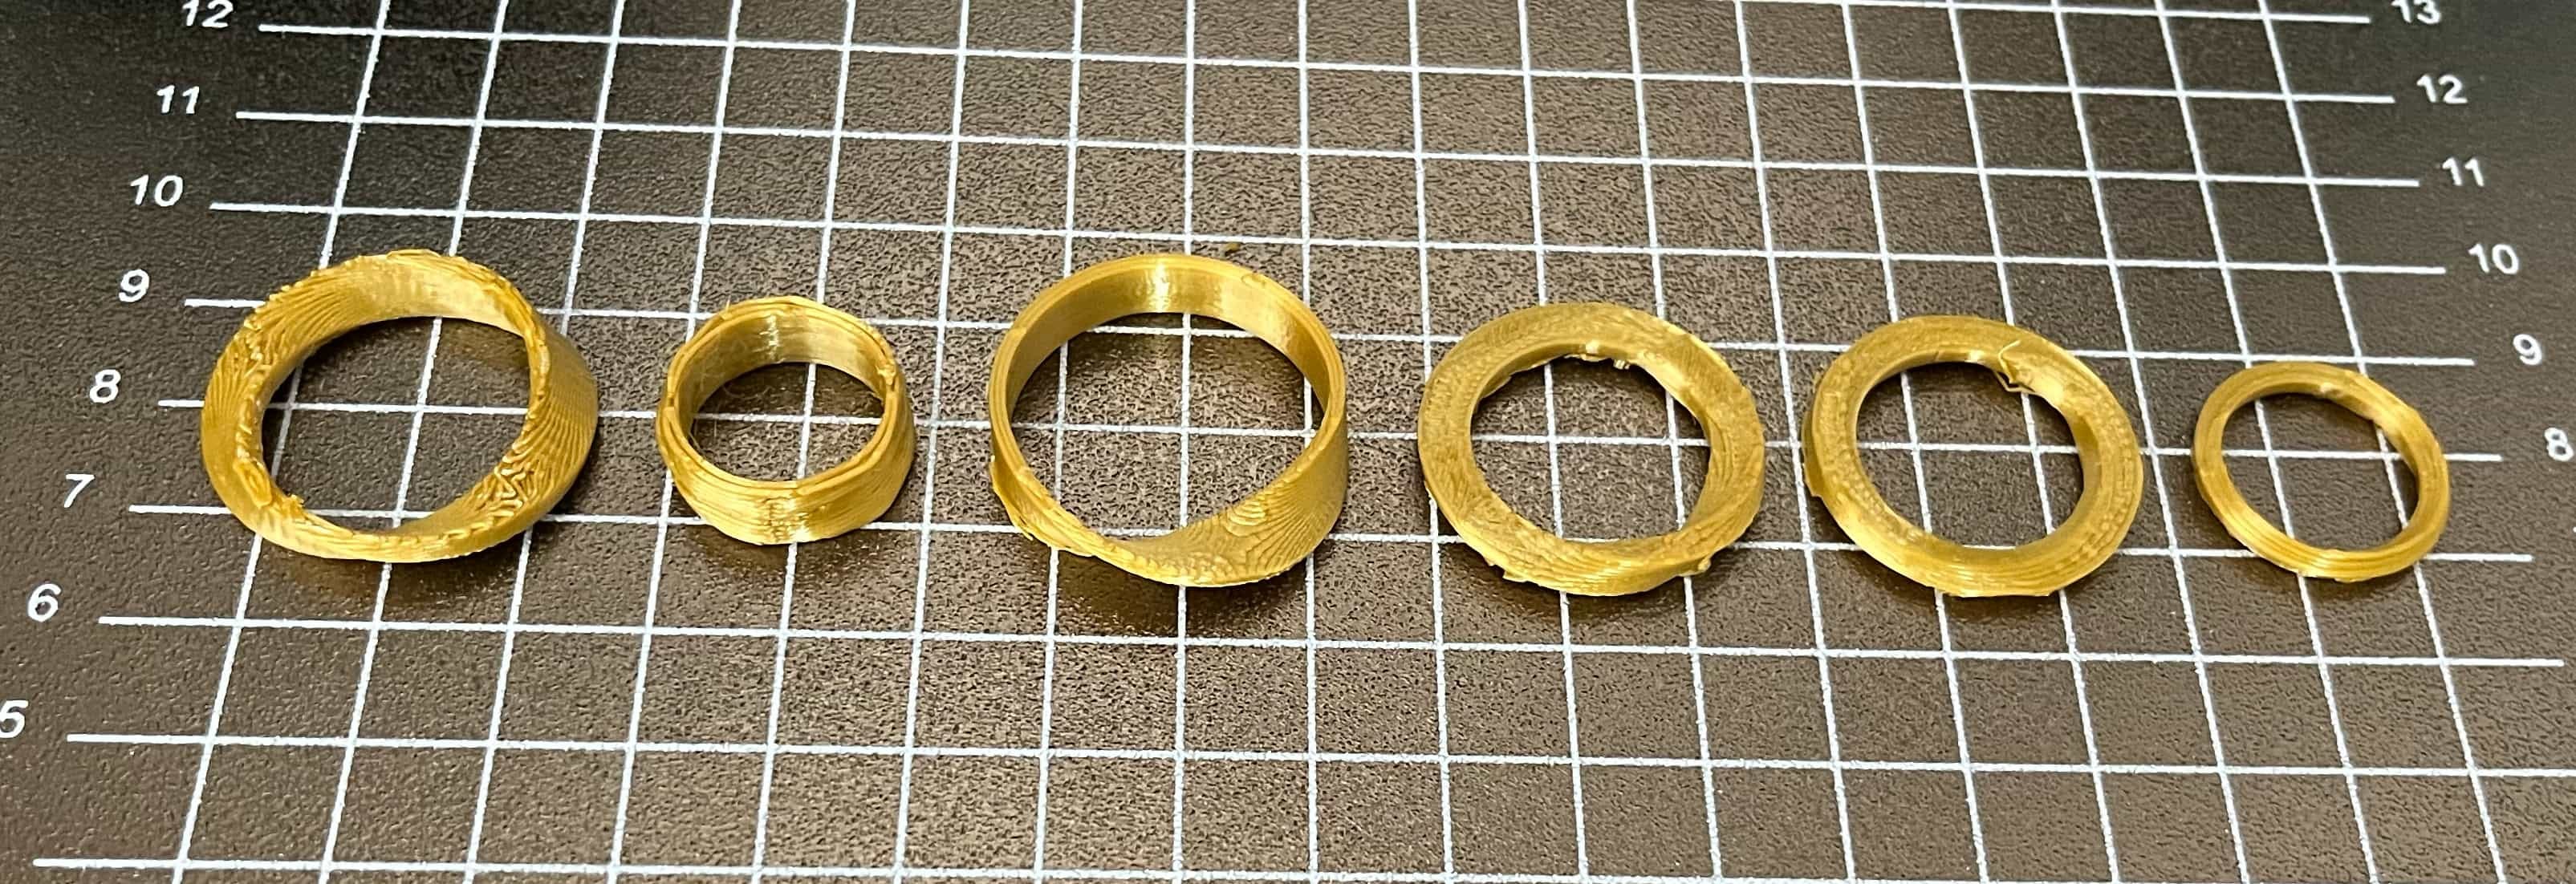
With each revision I got closer to the twisted ring, the rightmost one is pretty close. To create it, I made a rectangular prism, then rotated it around its central axis 90 degrees, and then bent it 360 degrees so the ends join.
I still need to prototype more until we get a ring that we’re both happy with.
Project 2 - neoBRUTO
In our (former) leg lab we have a beefy PC with a Nvidia 4070 graphics card that packs the horsepower to run image models much much faster than my Macbook can. As an example, to generate an image using a certain img2img workflow on my Macbook takes 60-80 seconds, while on the lab computer its about 1 second. I just happened to be tinkering around with it and discovered something pretty fun that successfully captured our attention for an afternoon.
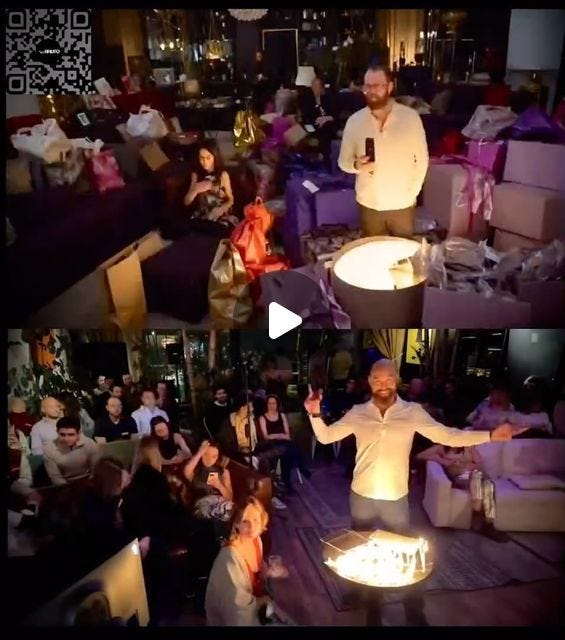
I decided it was time to take a shot at creating a live interactive experience at an event. Fortunately, my coworking space was hosting an AI showcase event and they were keen on the project. I teamed up with David who used his design magic to dream up our project name and image: neoBRUTO.

The idea is to use technology as a tool to help us reflect on what it means to be human. We’re hoping to incorporate these elements:
a focus on interactive experiences that explore very human interfaces, using our hands, our voice, our bodies, our imagination
help us understand ourselves and the world better
encourage people to collaborate and connect in person
question things and have fun
Our first installation took a camera input and a prompt input and transformed the image in near-real time (one image a second). Here’s a frame of me testing this out:


For our experience at the event, we created a candlelit altar and asked people to approach and choose a card from either the ‘dark’ pile or the ‘light’ pile, containing either the 7 deadly sins or a positive equivalent. Based on the card they pulled, I changed the image prompt which influenced the live image feed:


I was sitting off to the right with my setup on display for those who wanted to see the man behind the curtain (I was hoping to meet others who knew a bit about generative image models and I successfully attracted a few):
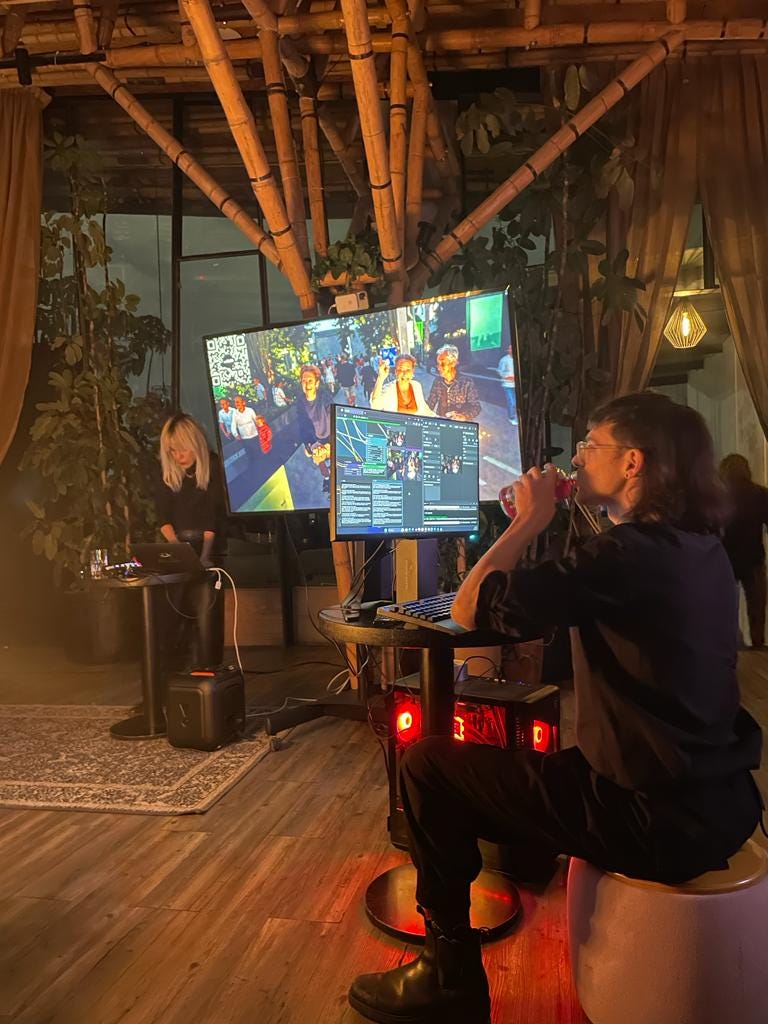
My partner P created a live audio soundscape to accompany the experience, with ‘light’ and a ‘dark’ scenes depending on which card was pulled. All the images from the camera were captured, so we made a timelapse, the bottom is raw, the top is the generated image.
Technical details
I used ComfyUI to build a workflow using SDXL Turbo (a latent diffusion image model), with LCM-LoRAs (smaller fine tuned adapters that speed up image generation significantly).
This image file below actually contains the workflow nodes, so if you install ComfyUI yourself, save the image, and drag it into your workspace, you’ll be up and running:

The main parameters I tweaked live are contained in these boxes:

I could increase step count to have more detailed images for slightly lower generation speed. A higher denoise level made the image more ‘creative’ and less like the original image. Depending on the prompt and the participant, I moved this up or down to get a more extreme or muted effect. The prompt and the LoRA impact what is generated for the final image.
This was the first time I’d done something like this for a live audience, so there were many things to improve for next time:
Faster image generation - people have short attention spans. The current pipeline generated an image between 1-2 seconds. (In the days since I’ve discovered StreamDiffusion which can generate images 15-20 images a second(!) - I’ll be using that next time)
There’s some uncanny valley going on, when it’s ’realistic’ people look deformed and ugly and they don’t like it. Some people at the event didn’t want to go on camera for that reason. I think it’s interesting to be provocative and polarizing, but it’s also nice to be accessible, so next time I might move towards a more animated style
There’s a new package out called InstantID which can preserve faces without training, it was a bit too new to be easily integrated into my workflow, but I’d love to have that so people can recognize themselves even after the image around them has been regenerated
The camera angle and zoom could be tighter. It was very wide and didn’t focus on the people at the table, so there was less incentive for people to come up and interact
The prompts could be refined, only half of them were interesting enough. Most of the ‘light’ prompts were a bit boring and didn’t change the scene enough
The dark music and mystical candlelit vibe was awesome, but not appropriate for the the AI networking event (even though it was well received, it felt out of place). We need to match our vibe to the event better, or rather choose better events
It was clunky to use a keyboard and mouse to do things live, when really all I needed to do was to turn a few things up and down and swap a few prompts. I’d like to explore a MIDI integration so I can connect a controller that has simple buttons and knobs to make it more professional. Or, better yet, have it voice controlled, body controlled, or self-controlling!
Going forward
I think I will stick to roughly weekly updates from now on but try to pick one or two projects to work on consistently for a month (or more!).